Coffee Machine
This page includes the documentation of creating a machine by fab lab Bahrain Students:
Assignment
Work and communicate effectively in a team and independently to make a machine, including the end effector, build the passive parts and operate it manually. And automate and document the work.
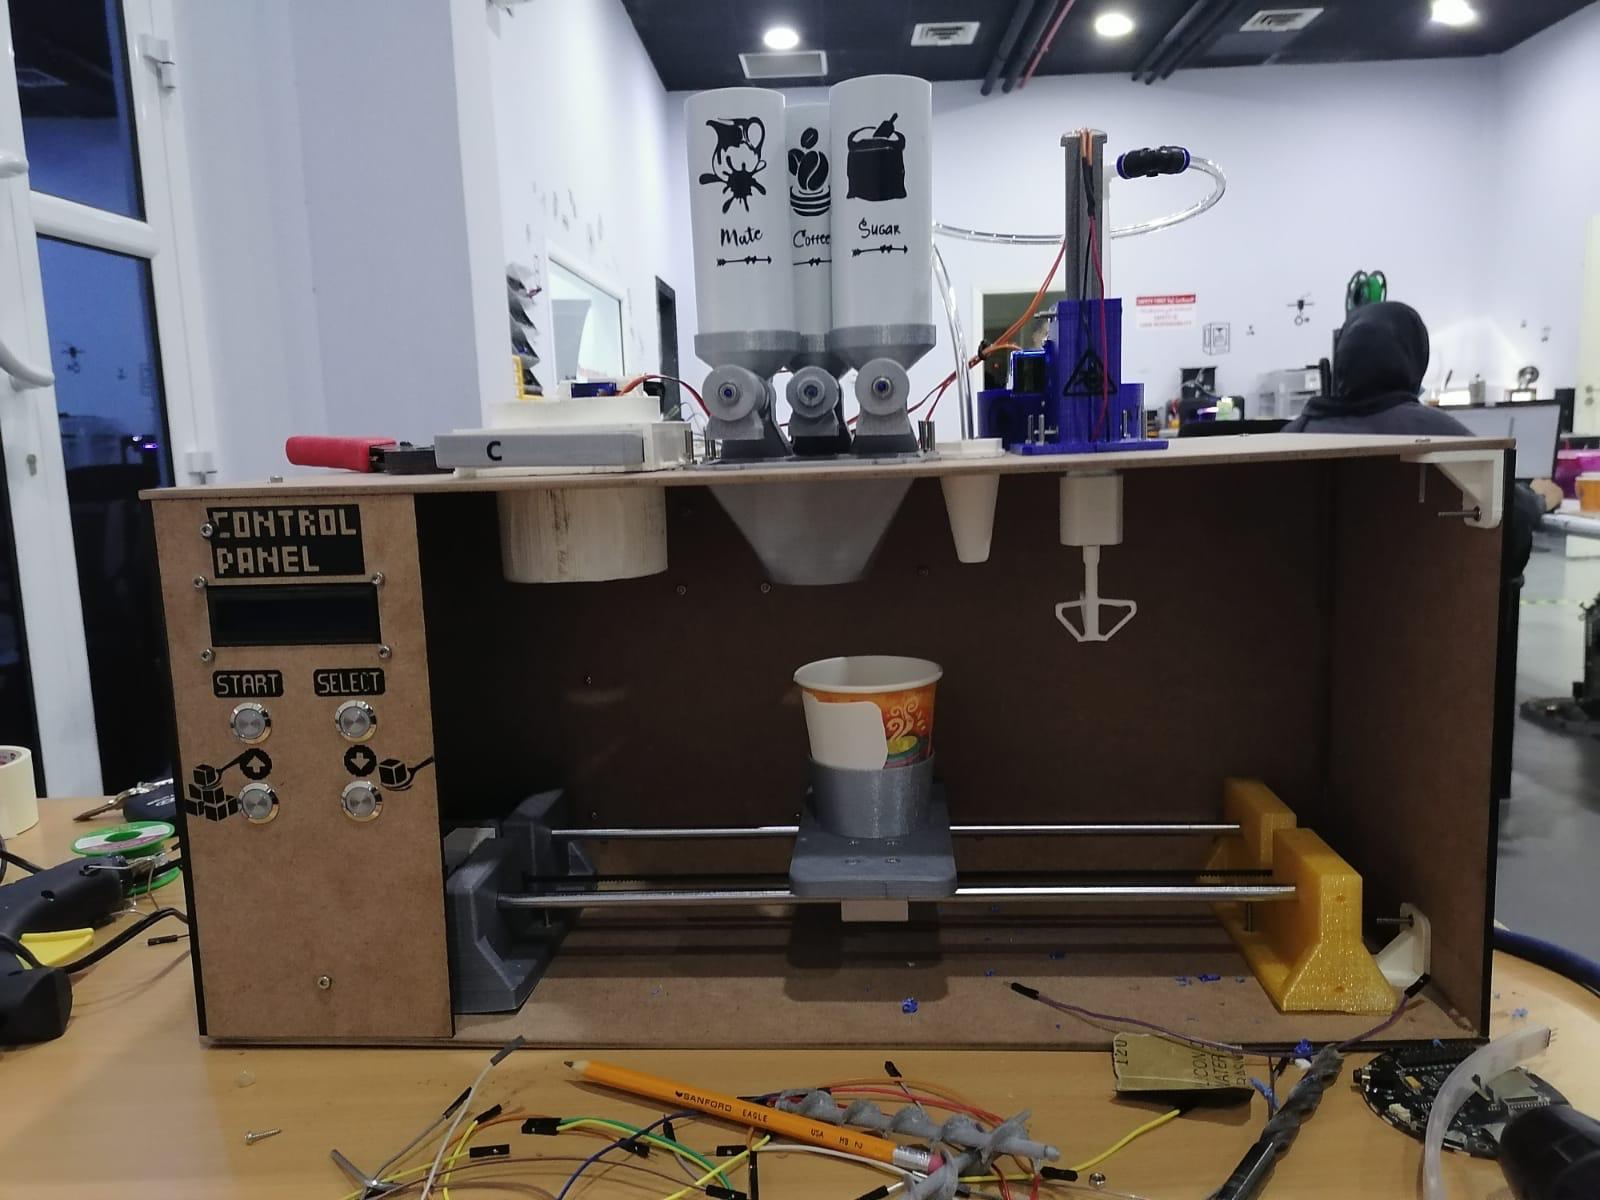
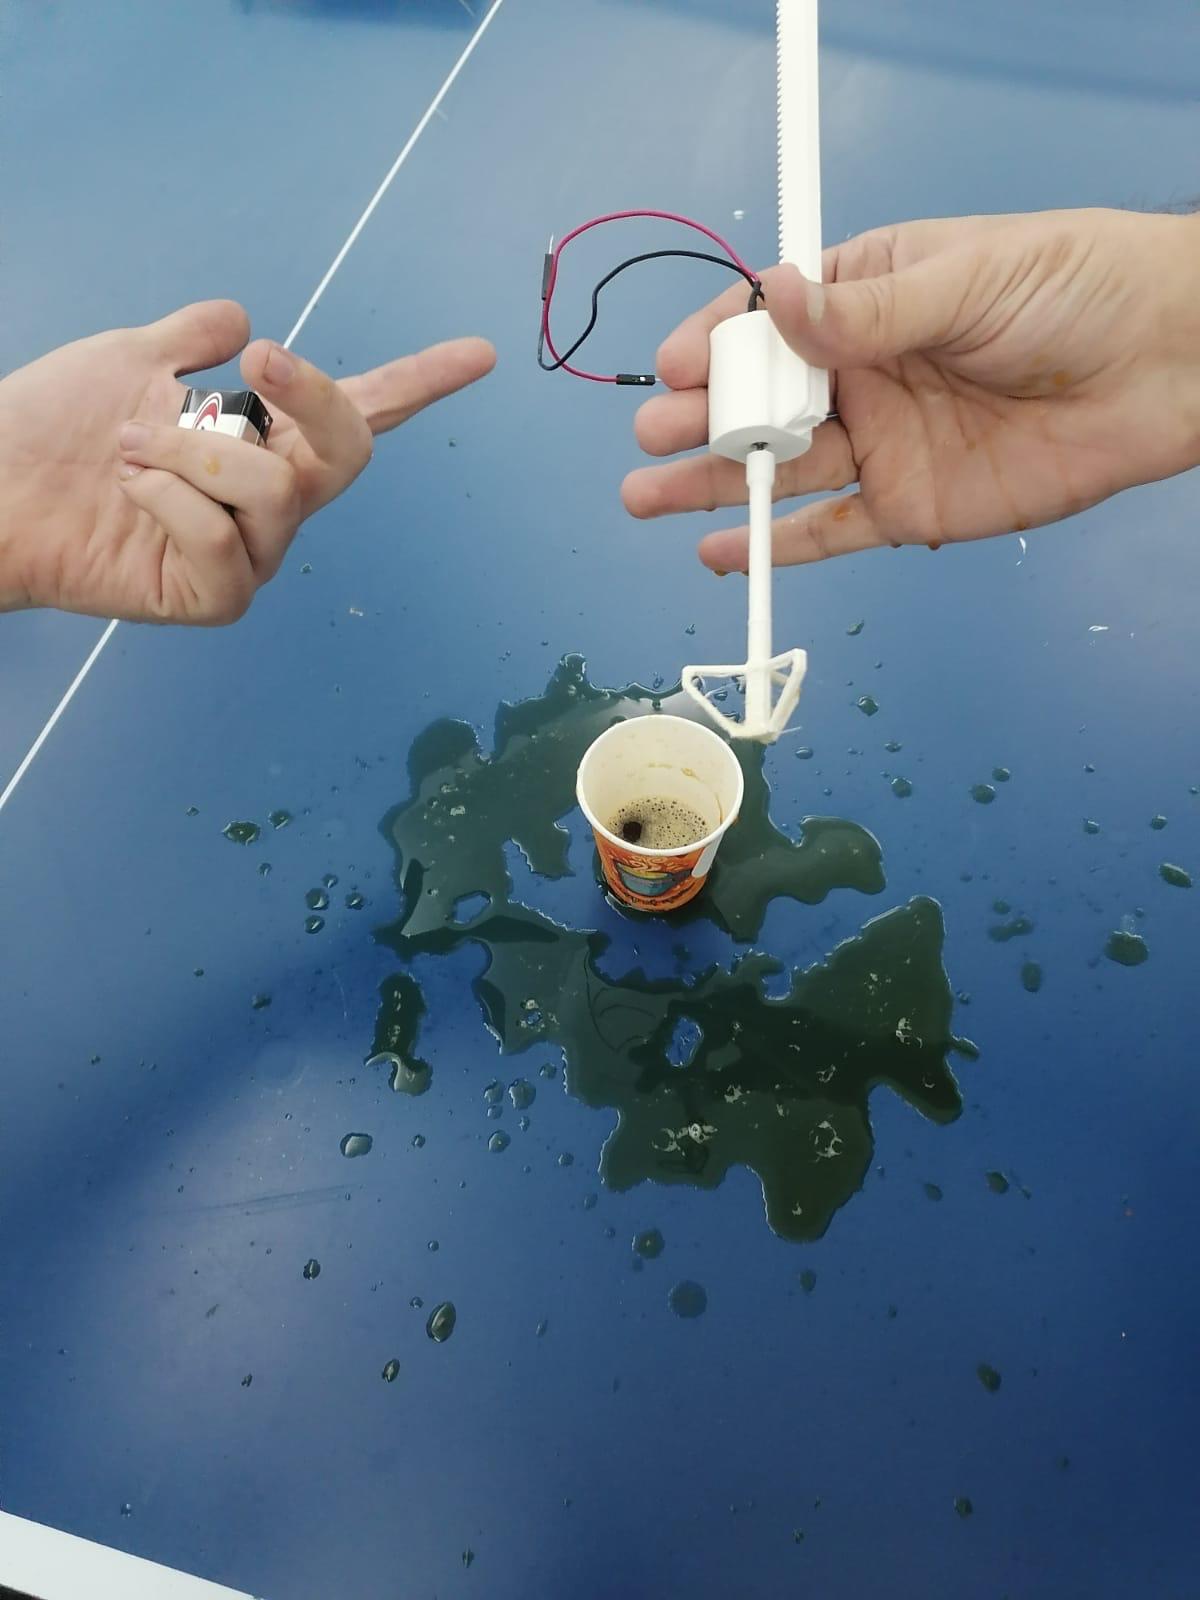
Final machine pictures and video
Concept:
What the machine does and why
Due to the fast pace of our lives, sometiemes, taking a time to make a simple cup of coffee could be a challenge! specially if you’ll have to look for the ingerdients and tools to make and measure your coffee! Our coffee machine is a machine that comes handy in almost every adult daily life. It allows the user to to communicate his personal prefrence of coffee through voice recognition. The machine then take the order and act accordingly. Not only, this high tech feature is what makes our machine special, but also the ability to see the process of making the mechanism behind it which is normally hidden, is what makes our machine more fun to use.
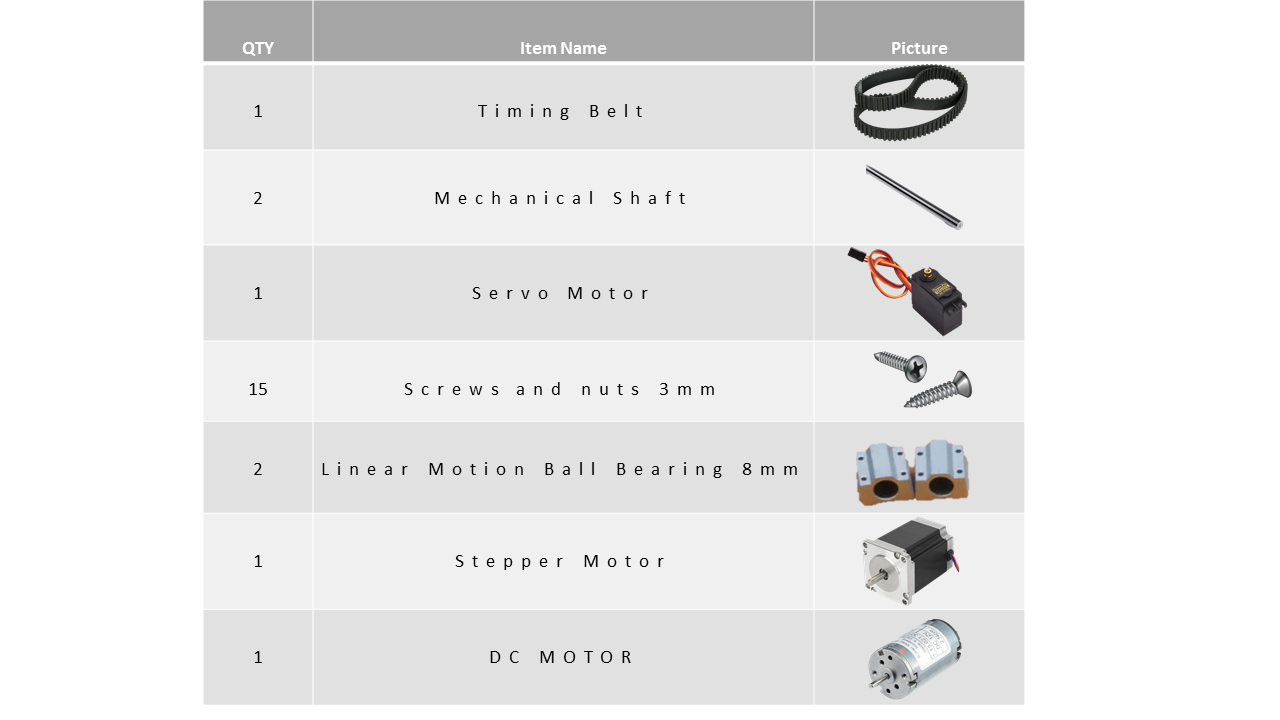
BOM
Design
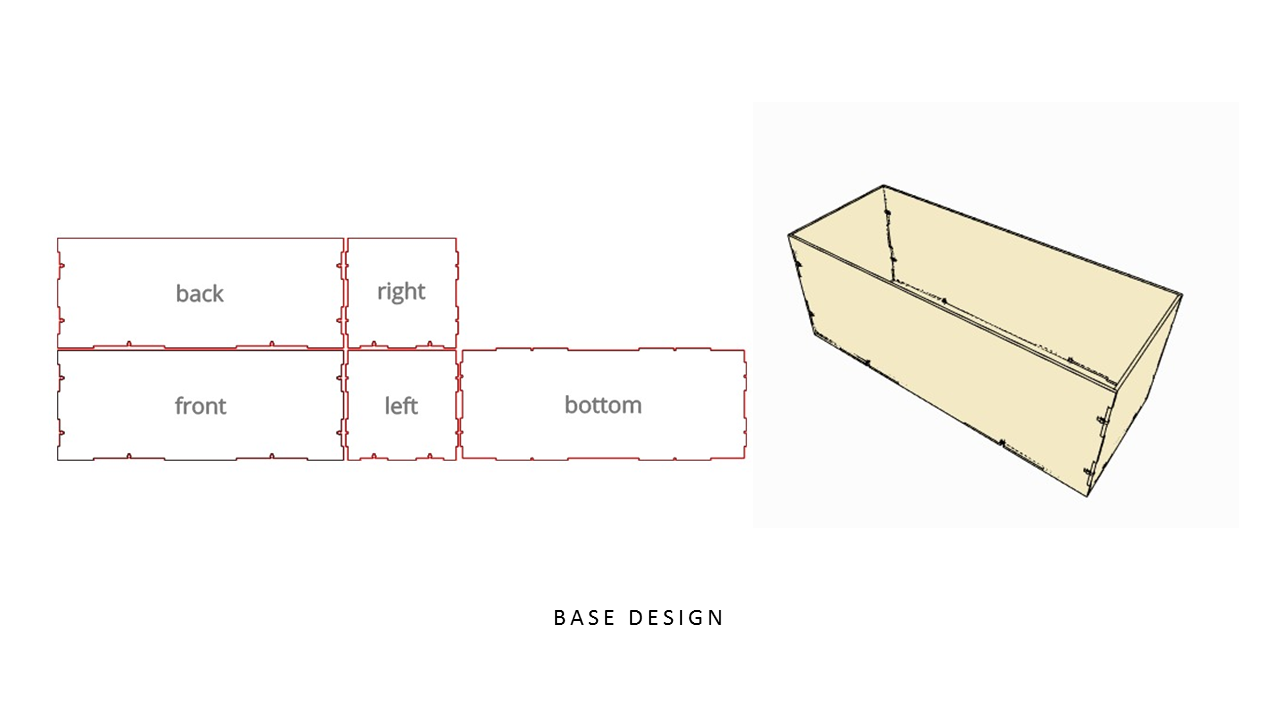
Base design

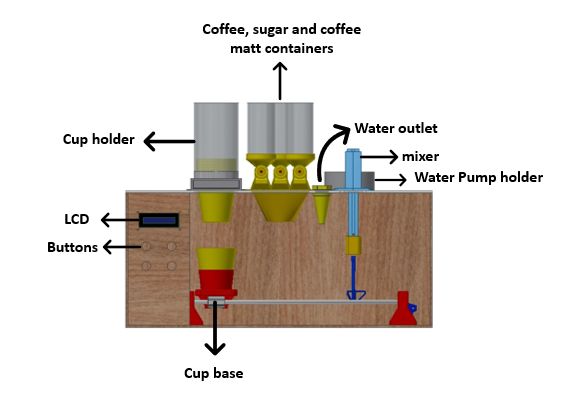
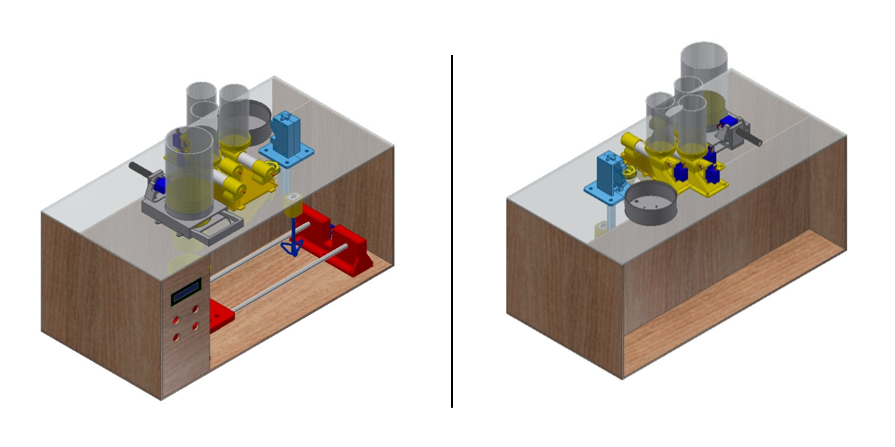
Coffee machine Design
In this project we have designed every part in machine starting from the cup holder and base, coffee containers, water outlet with the water pump base and finally the mixer.
Structure and Building
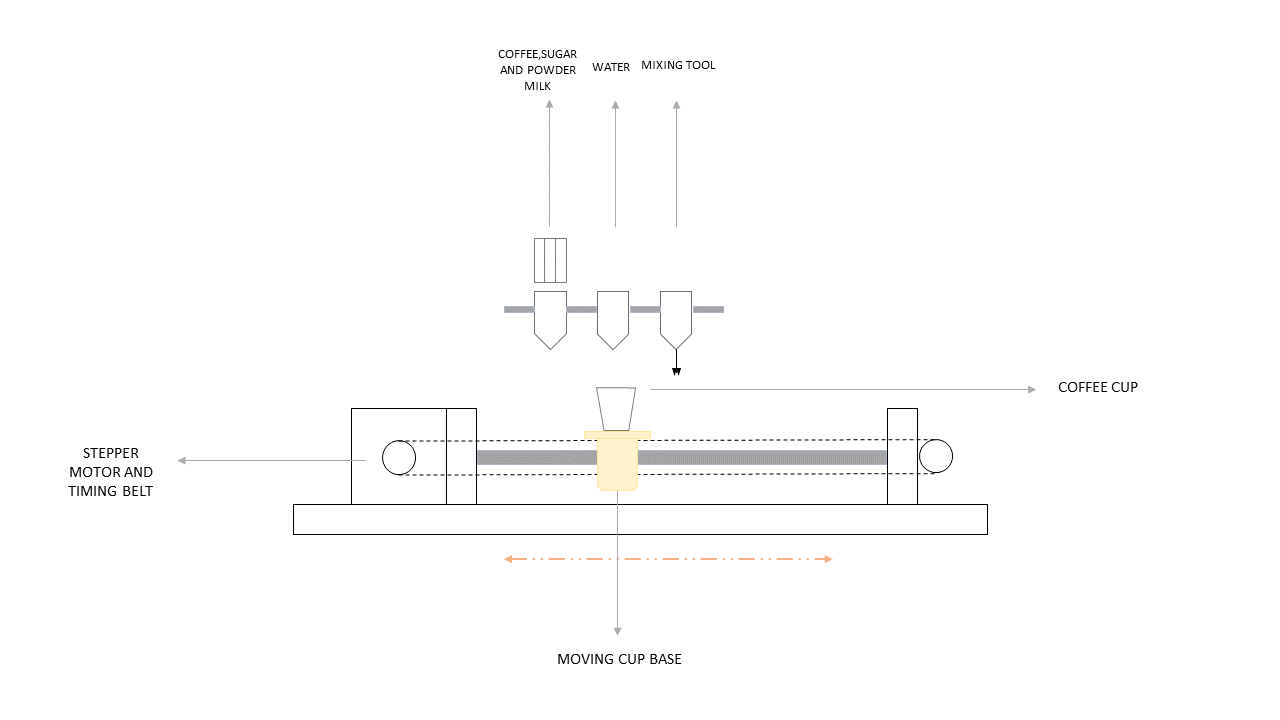
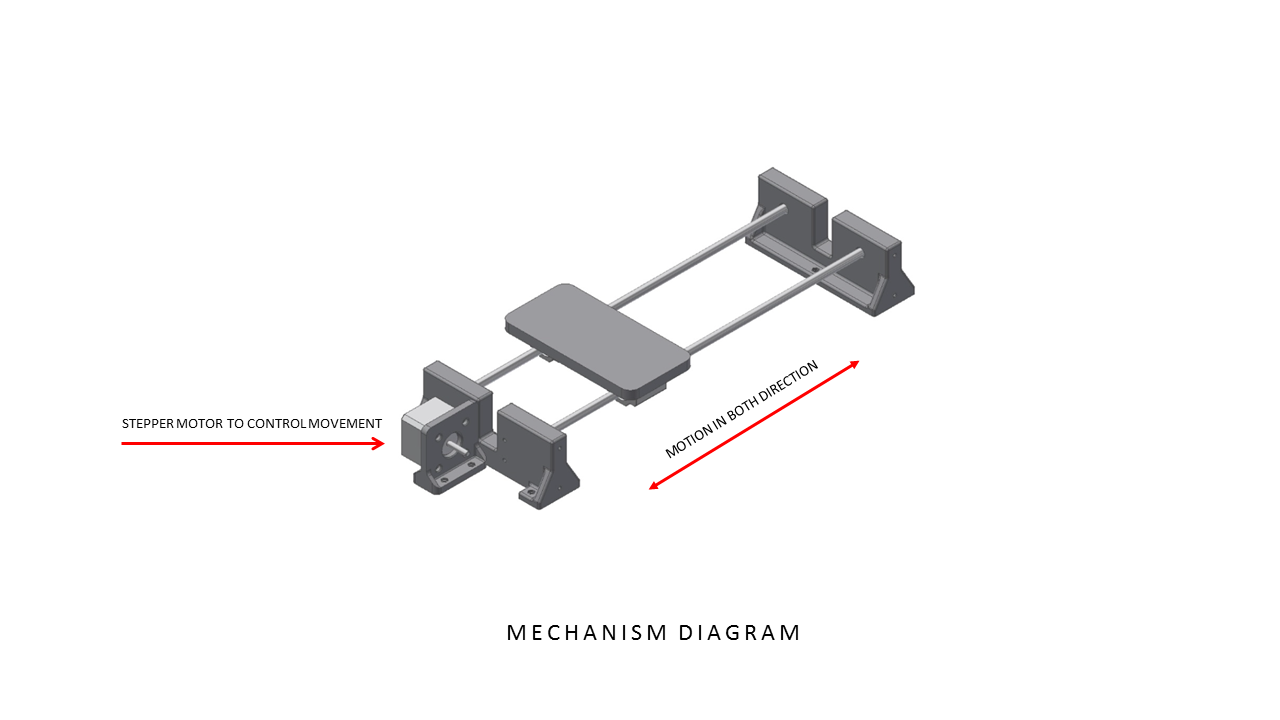
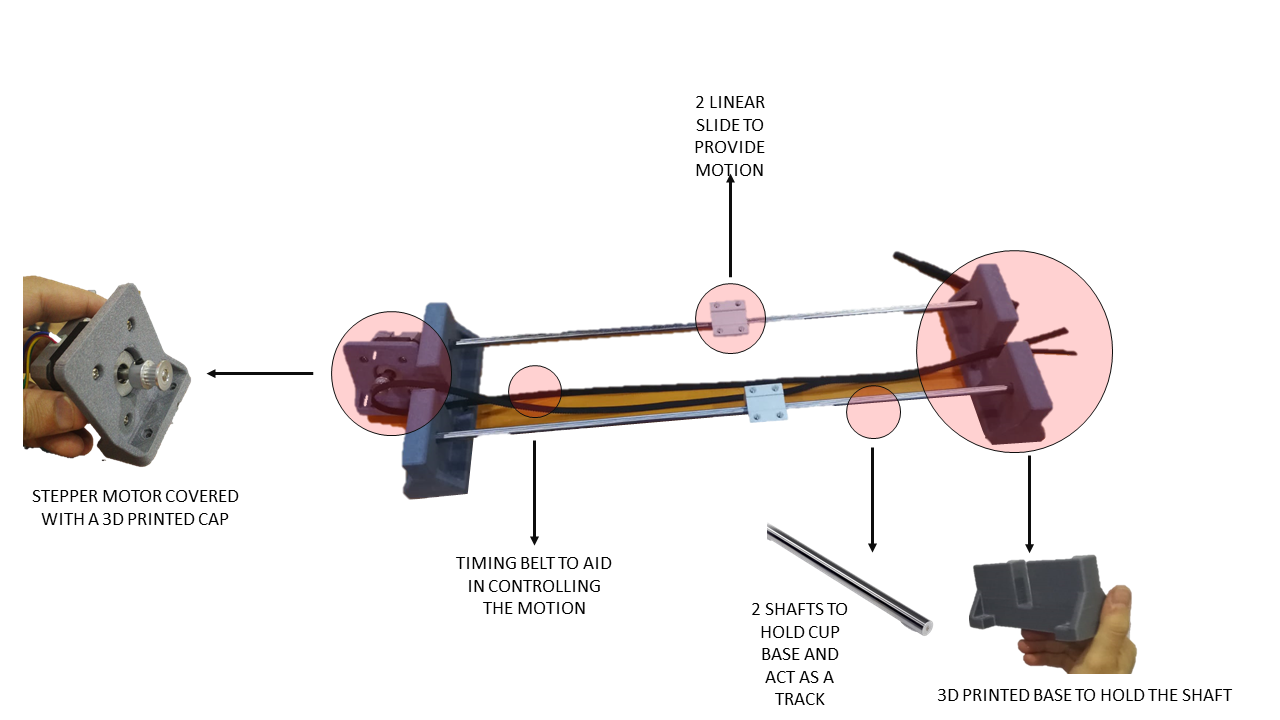
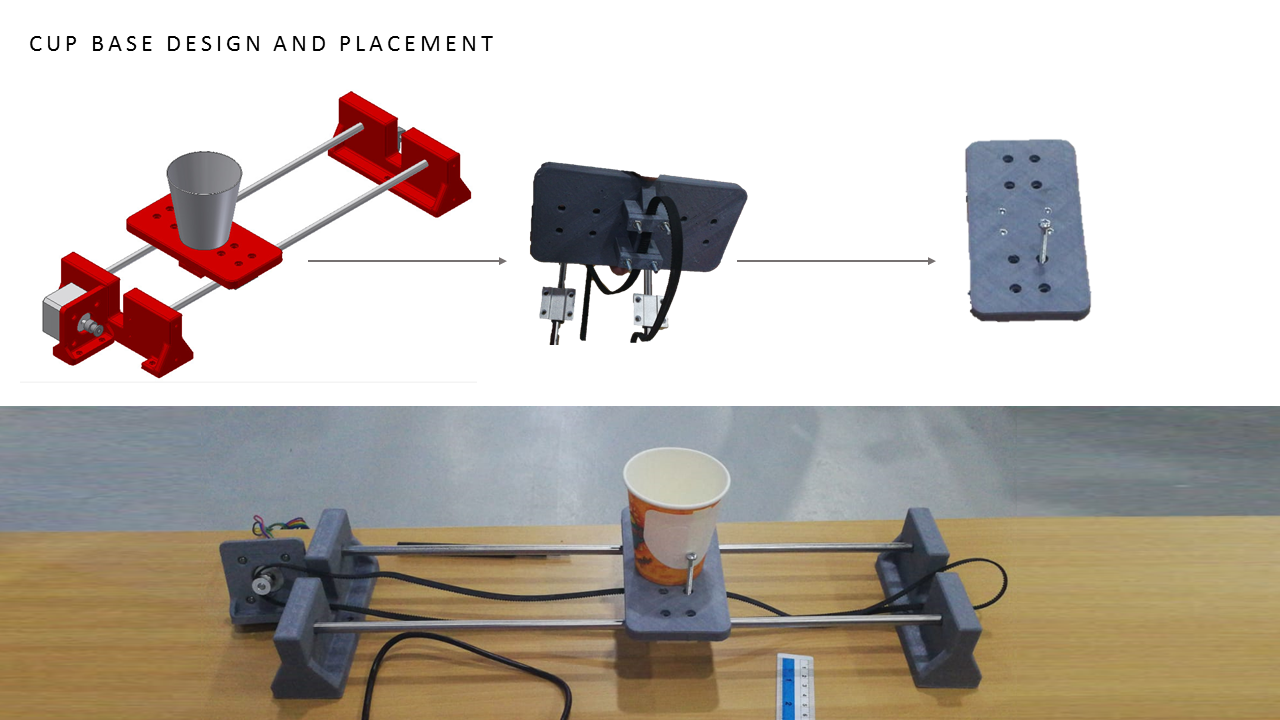
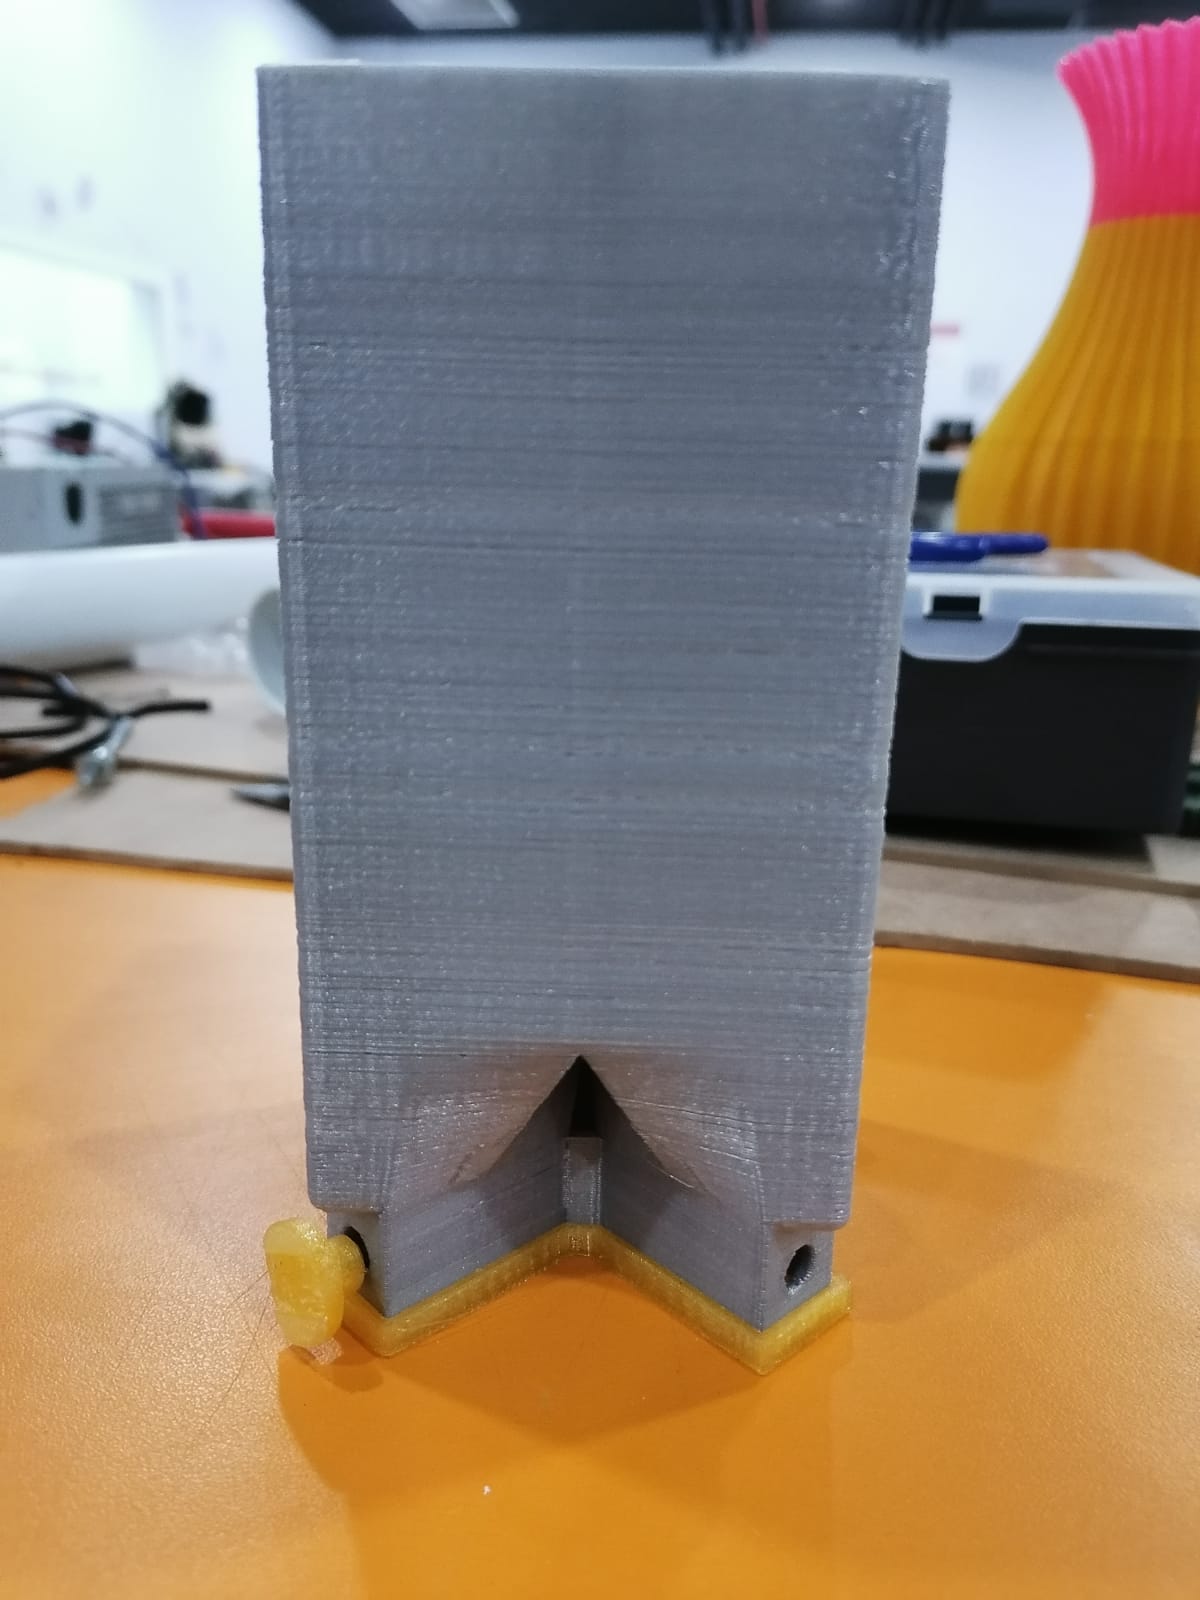
Cup Base
In the cup base we used 2 stepper motor to drive the cup base forward and backward also we did design a stepper motor cover and printed by 3D printer. On the motor shaft we attach a belt to control the motion. Finally, we design, and 3D print two bases to hold the shaft which will hold the cup base and act as track.
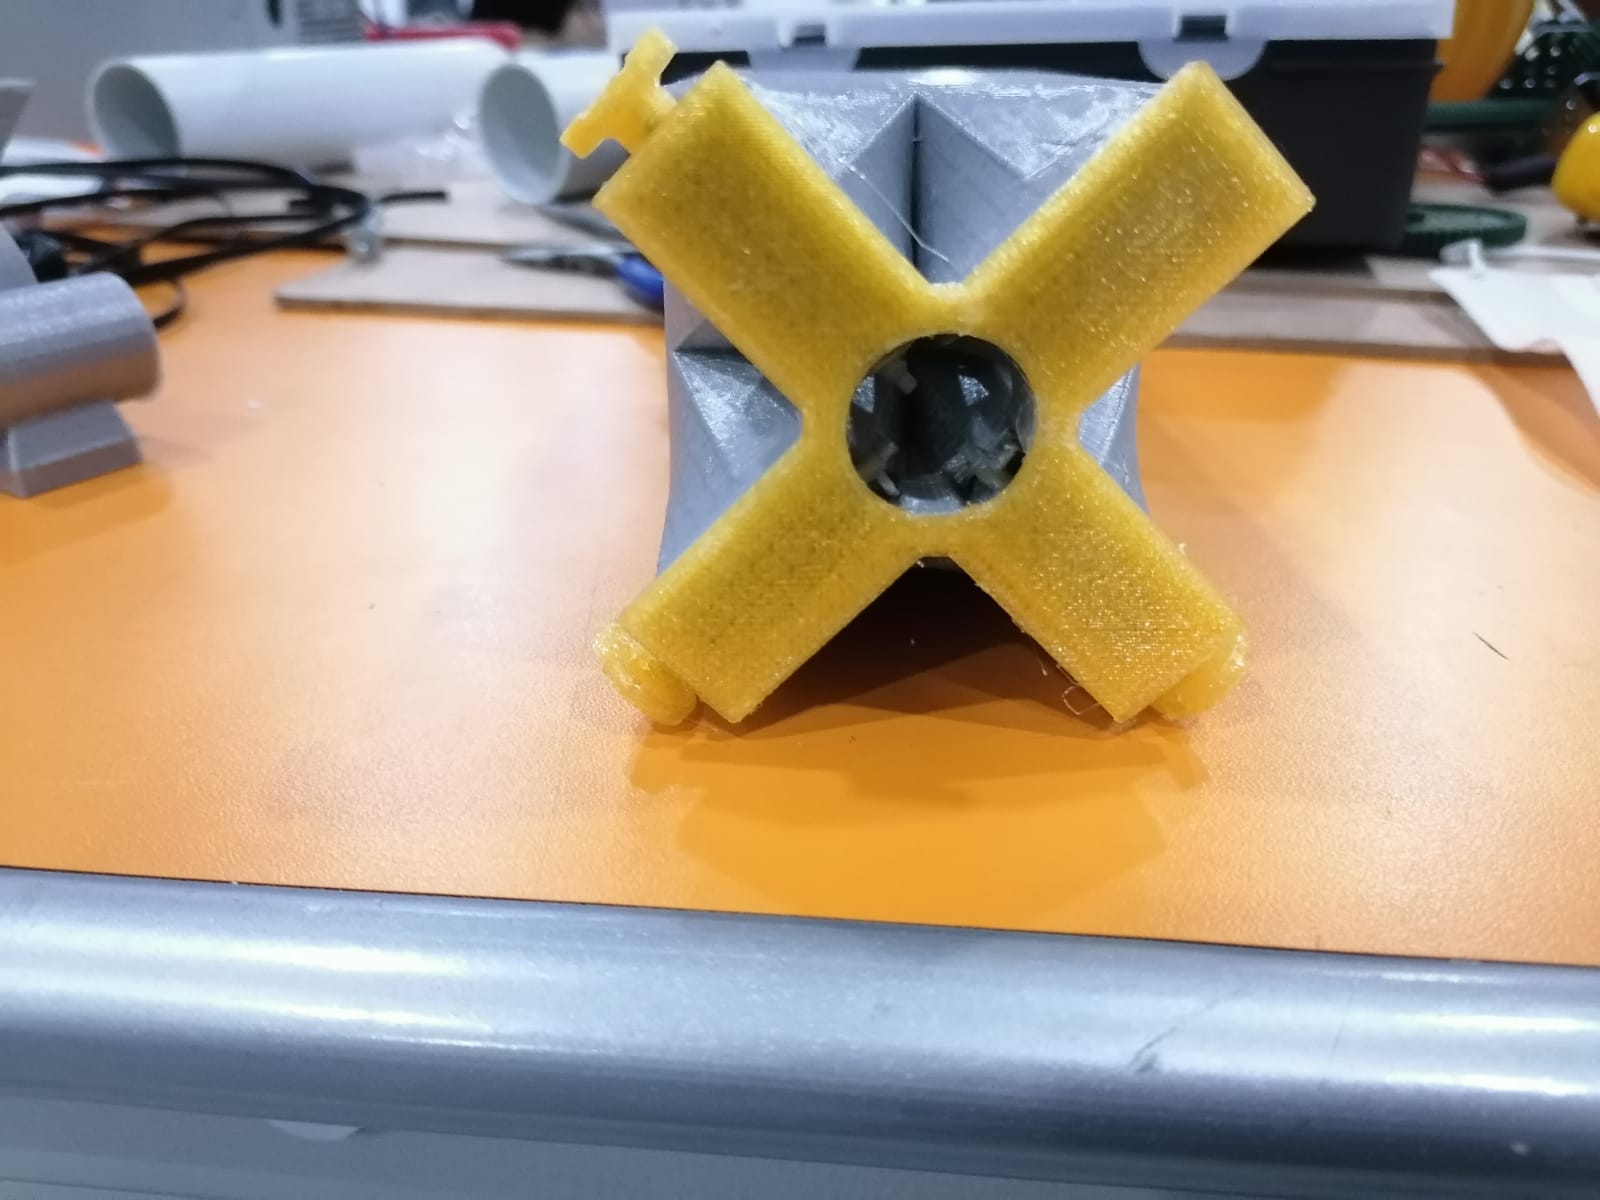
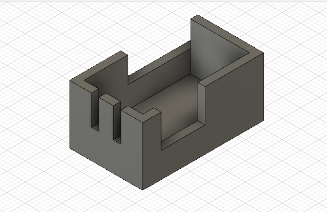
Cup Holder
The cup holder is designed to release one cup at a time. In each time that we start the servo motor in the cup holder will work automatically. At first we design the cup holder without the additional cup tack but we notice that the cup is not fill in position so to ensure that the cup will be exactly in position we add the cylindrical part beneath the cup dispenser.
First Trial
Final Trial
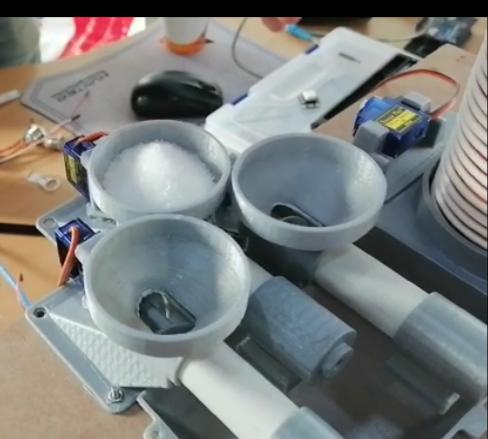
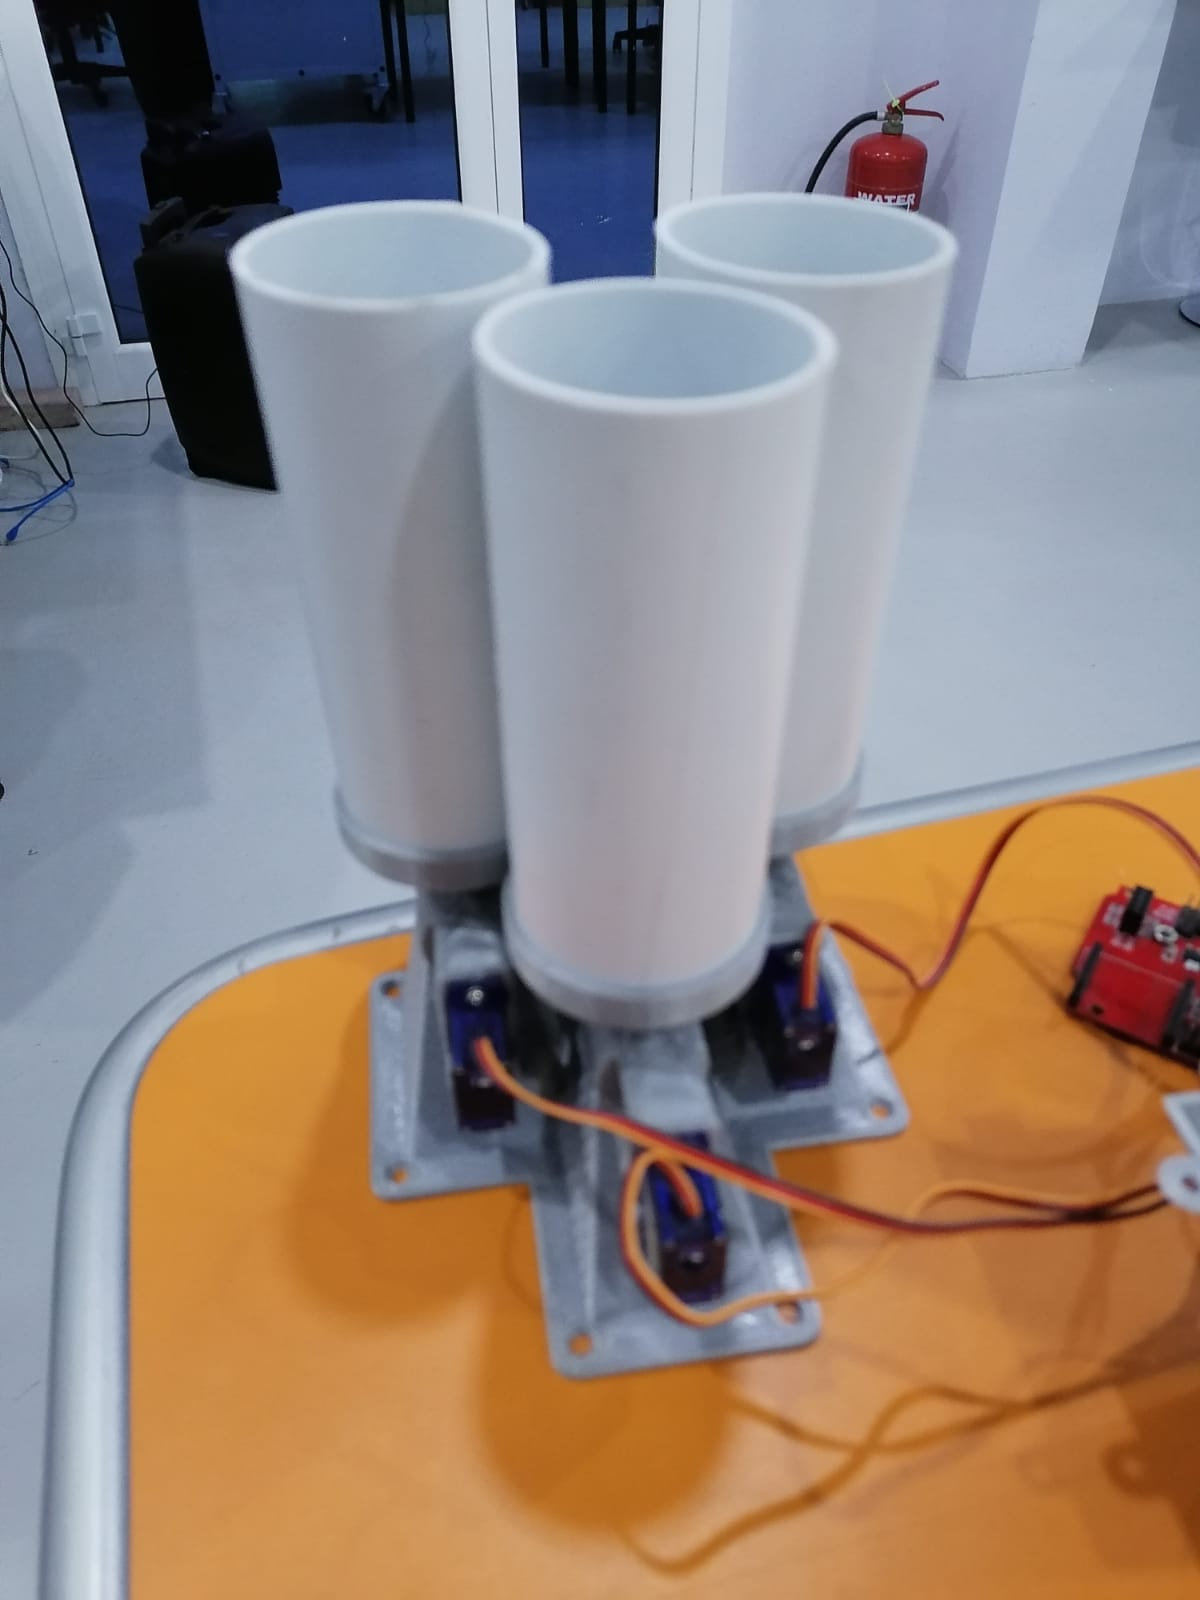
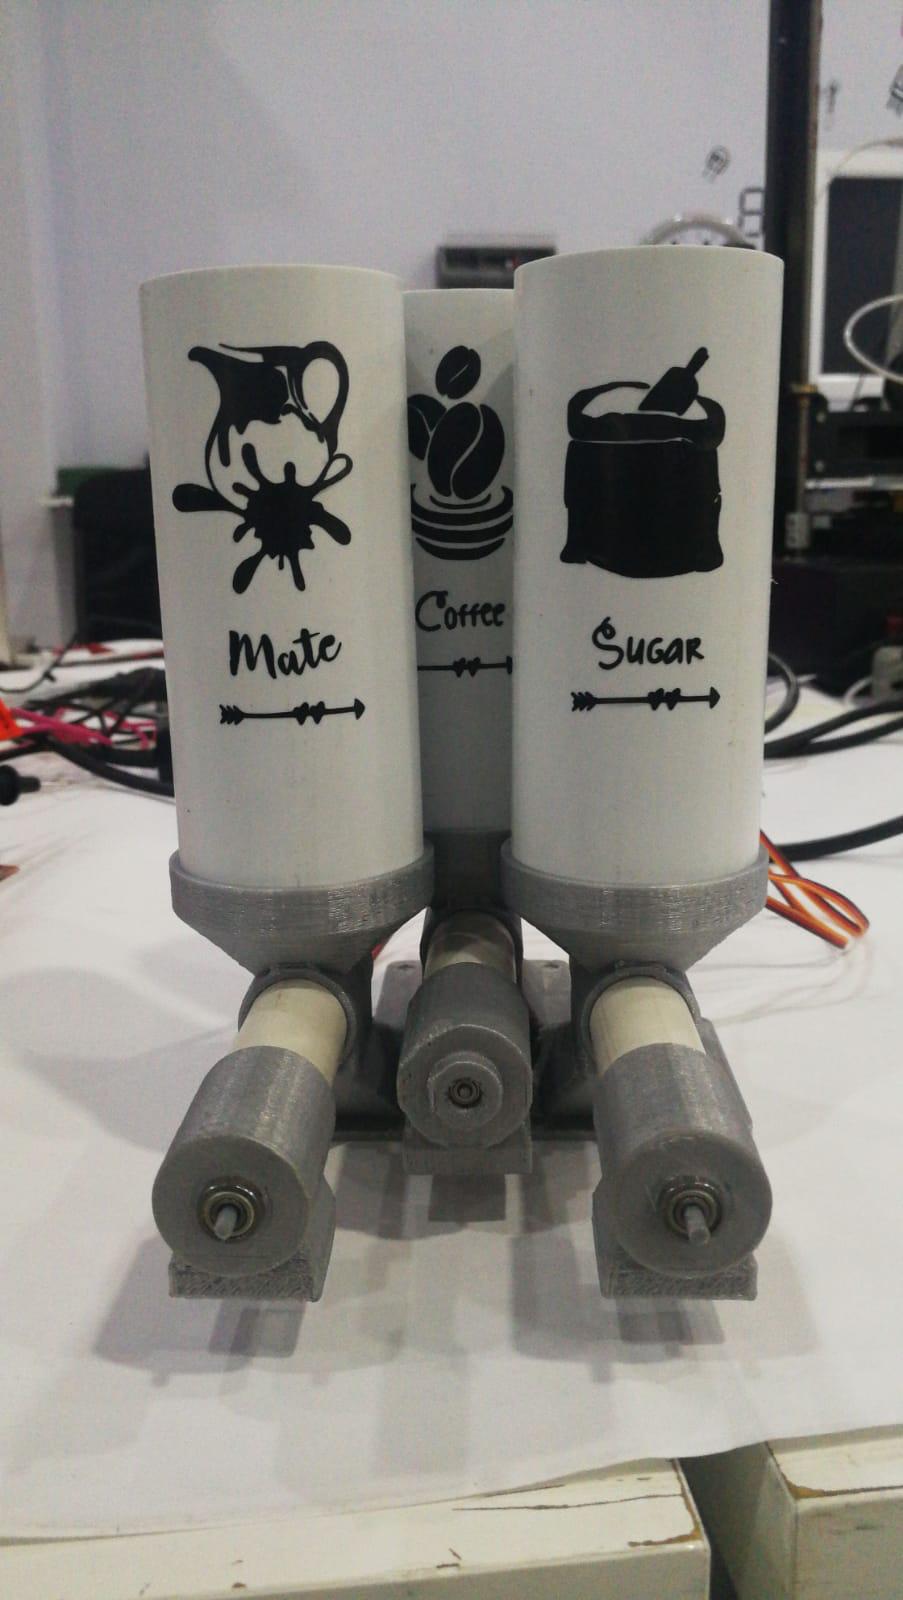
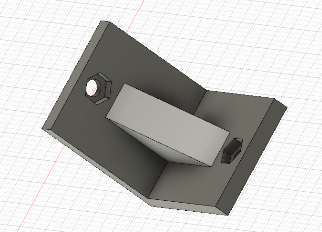
Coffee dumping
Coffee dumping is used to release the coffee, sugar and coffee mate according to the user input. In the coffee dumping part we have three outlet each is responsible of one component and connected to a servo motor.
The first trial we had design and 3D print the coffee dumping as Cuboid and divide it into 4 sections, but the design is failed because once we add the ingredient, they start to fell into the cup without stopping.
The second trial was a successful trial as we change the design to print a small conical shape and attach 3 plastic pipes to it in order to store the ingredient on it. We have also designed a different type of shaft to block the ingredient from falling when the servo motor stops.
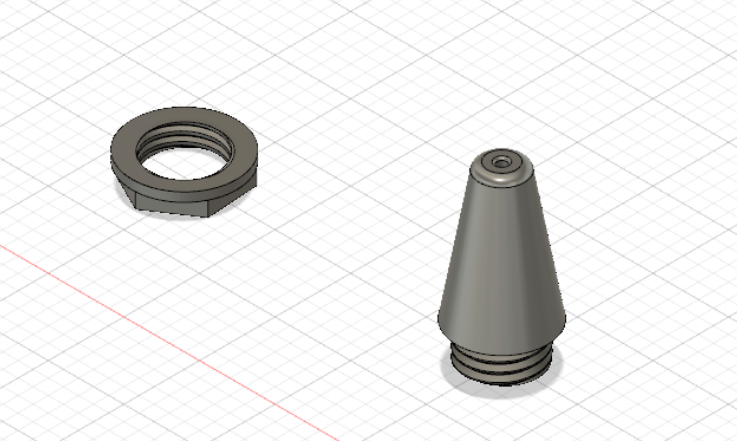
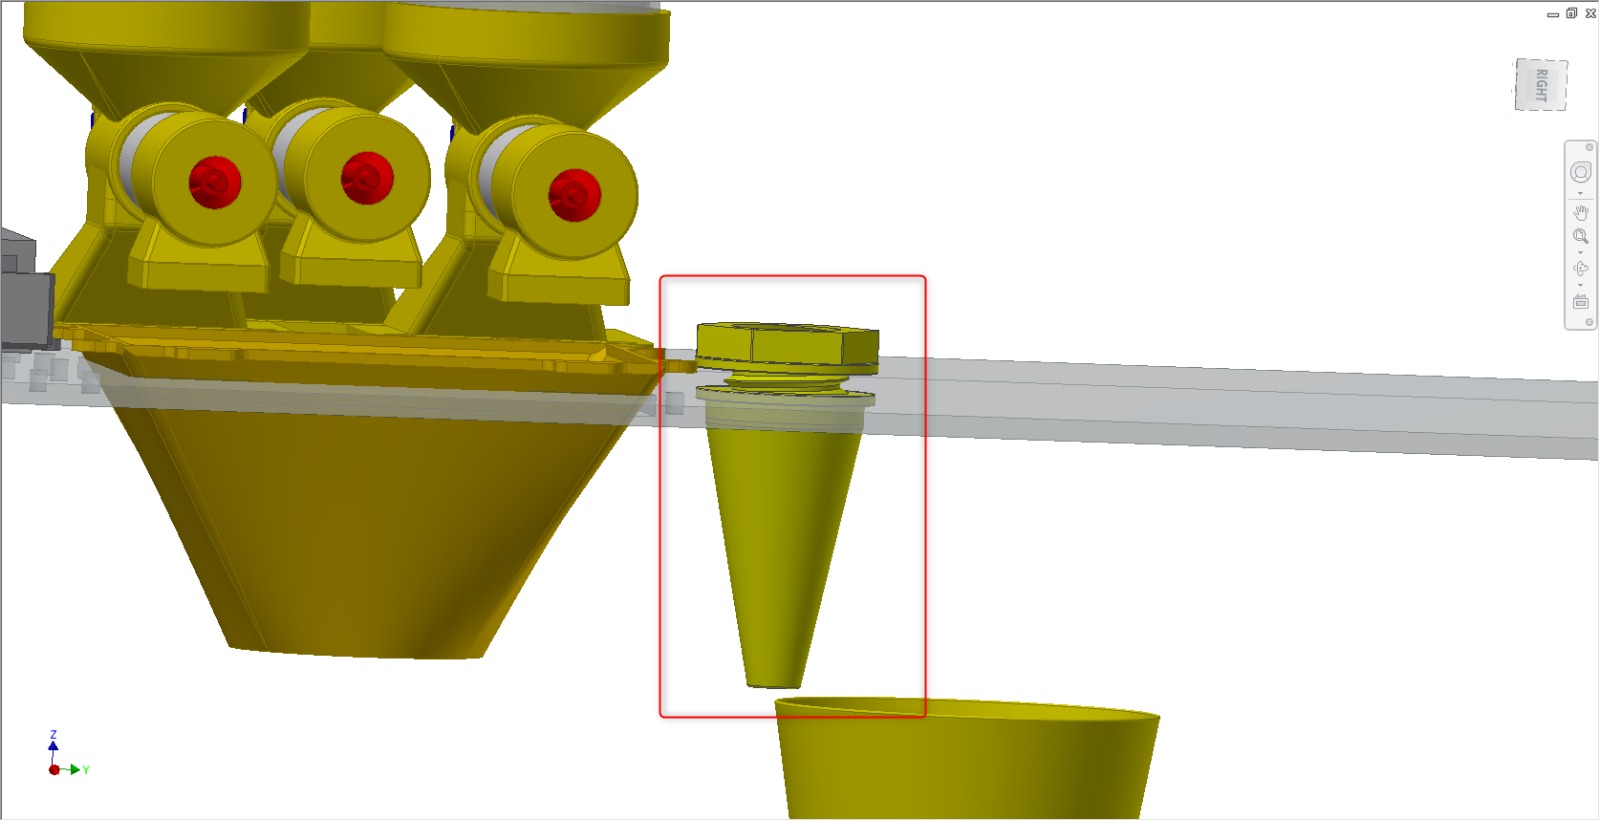
Water outlet
The water outlet is deisgned to fill the coffee cup with water. It has a conical shape with a hole to insert the pump outlet pipe.
Water Pump
In the water pump we have designed, and 3D print the pump base to place the pump and the tank inside it. At first, the design of the valve have been done in order to control the flow of the water directly from the tank the valve here will work as an on/off switch and controlled by a servo motor, the type of the valve was butterfly valve.
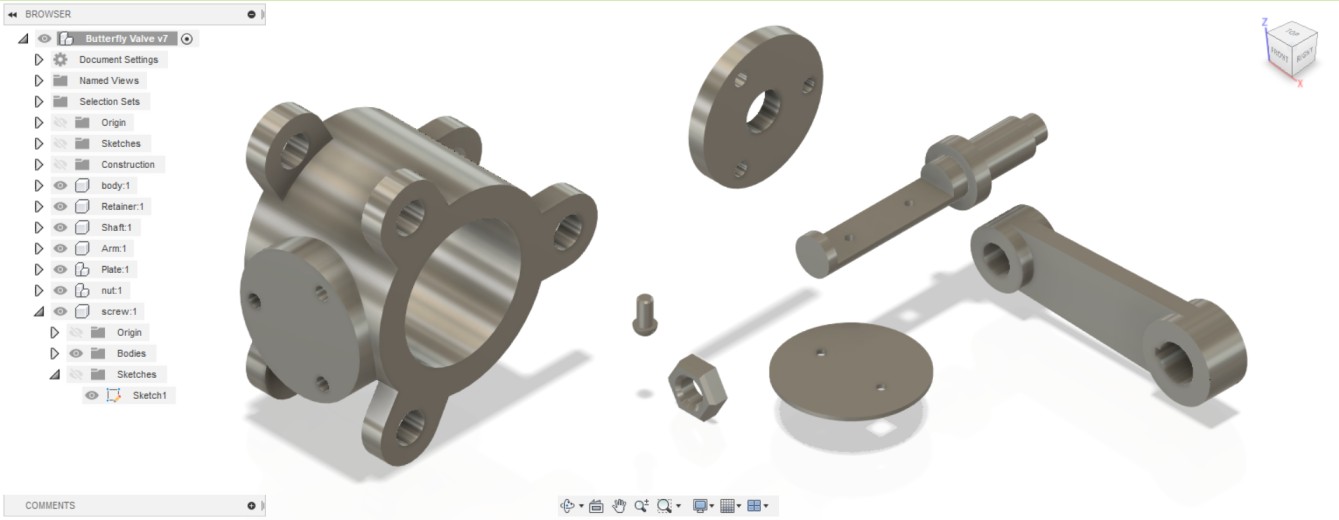
As the valve designing does not fit our project we decided to control the water by using a water pump as it is much easier and more accurate.
Mixer or Blender
For the blender we have first decided to use a maniacal kit in order to mix the ingredient together. We connect a servo motor to a slider and then check if it is work. The design worked as required however it was to heavy to be placed so we decide to design the same design with Autodesk Inventor and then print it by a 3D printer. We Attached a DC motor to control the rotation of the mixer and servo motor to control the mixer level or the movement of the blender up and down.
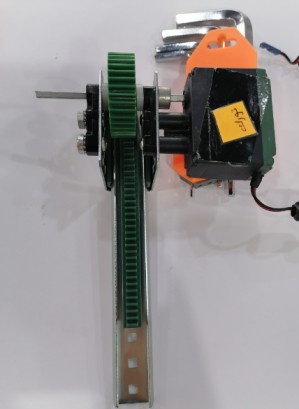
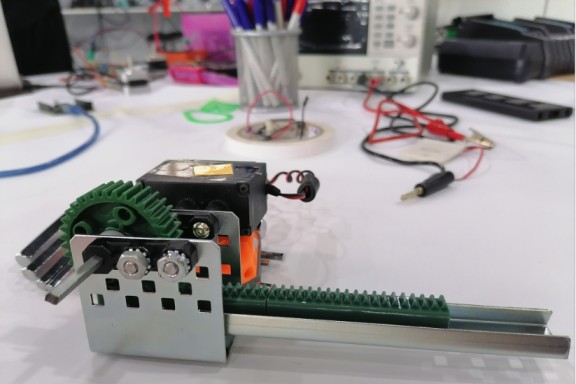
Using the DC motor directly without controlling the speed of it will cause the coffee to flow out of the cup.
Limit switch
The limit switch is used to indicate that the cup is in the correct position to start the coffee making. In order to place the limit switch we have design and 3D print a limit switch cover by taking it is measurement.

Support
To hold the base design together we have designed and 3D print a support peace to hold the walls and roof.
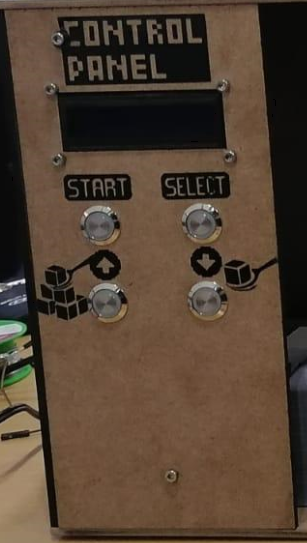
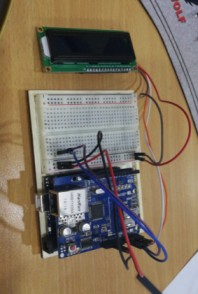
LCD, BButton and LED stripe
The LCD is used to tell the user what variable is needed to be entered and what stage is the coffee machine in. The Button is used to allow the user to start, select the amount of ingredient and stop the machine. The LED stripe is used for decoration it changes it is color in every state.
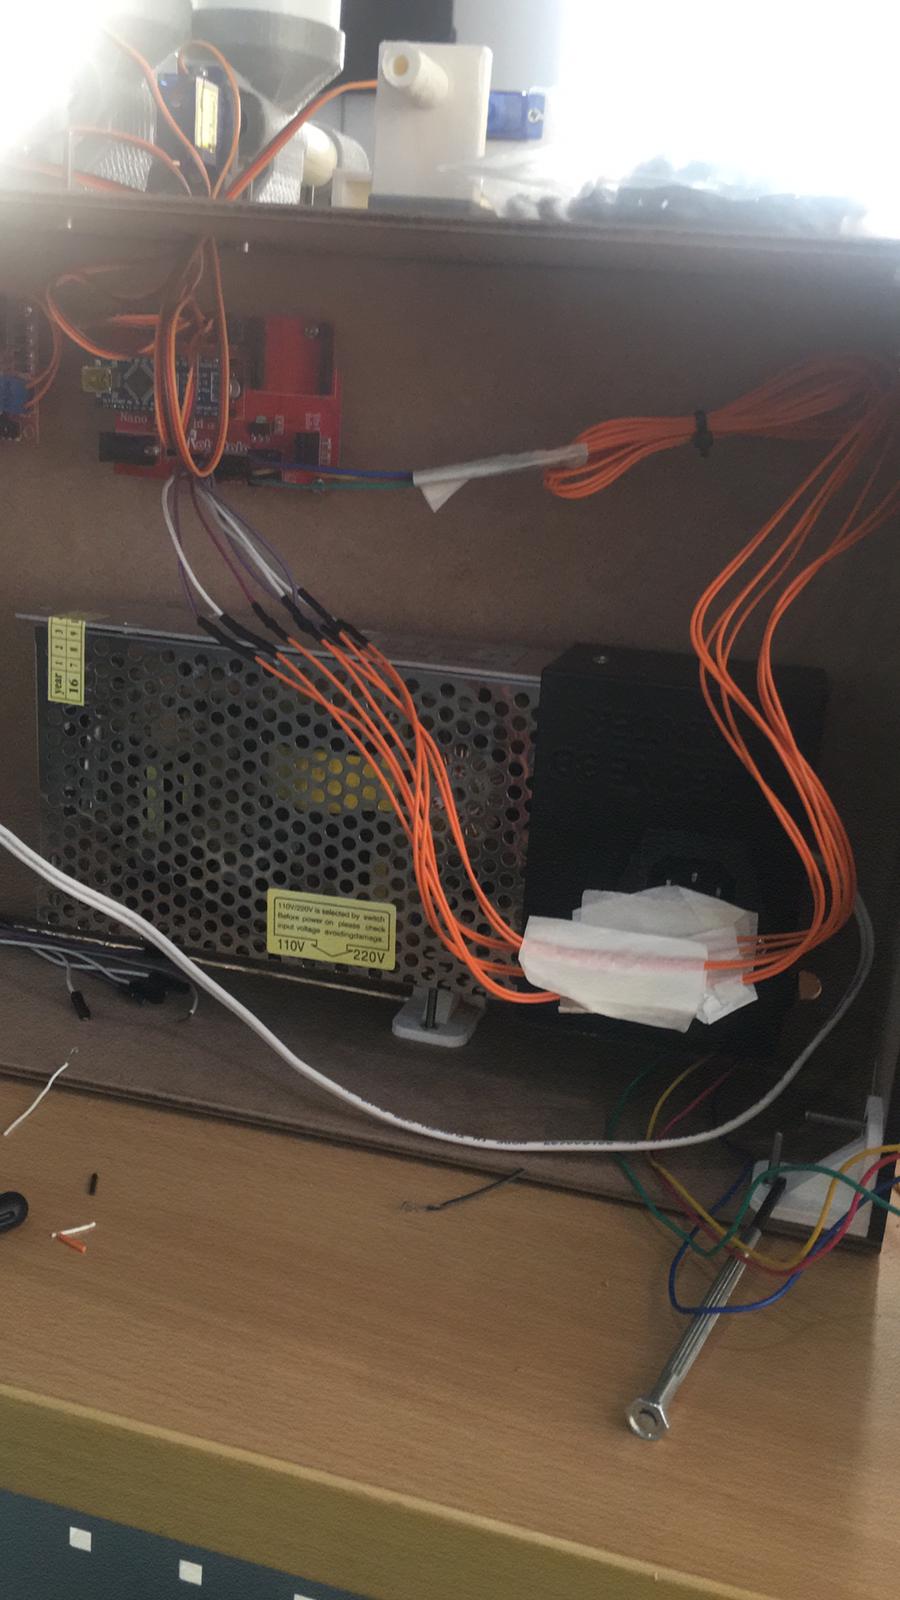
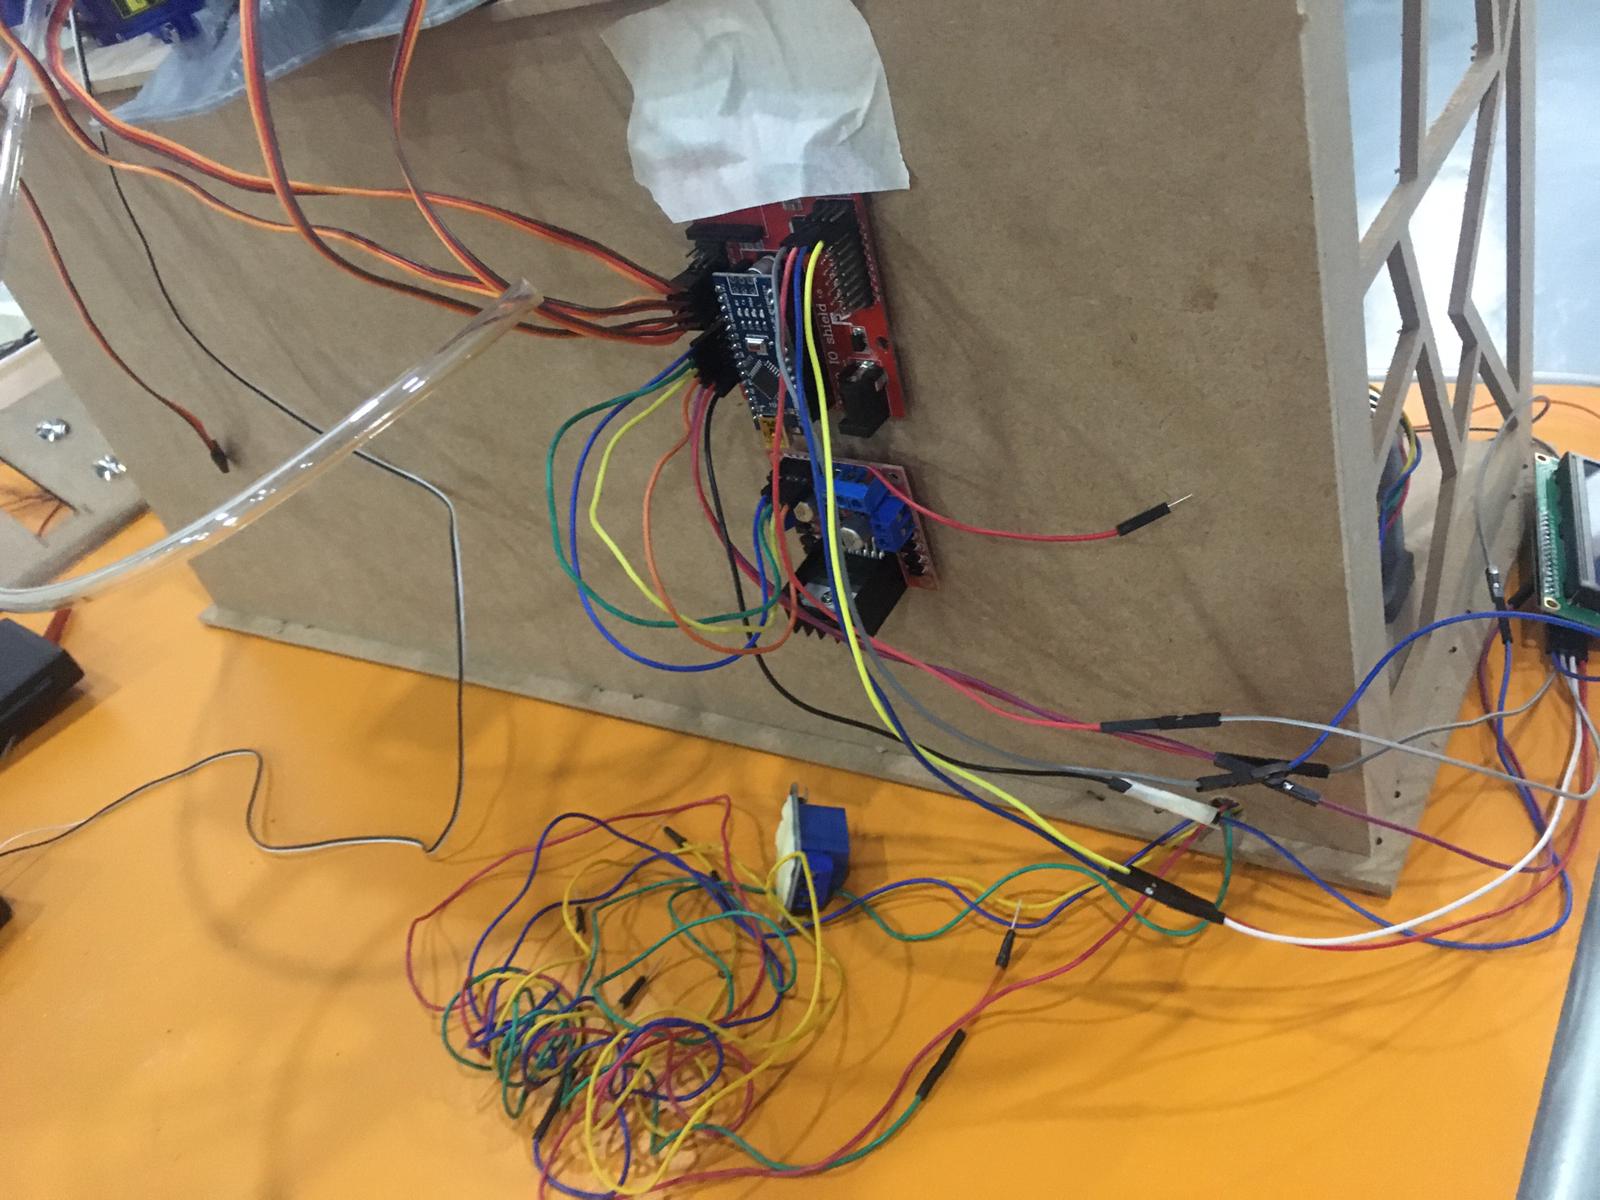
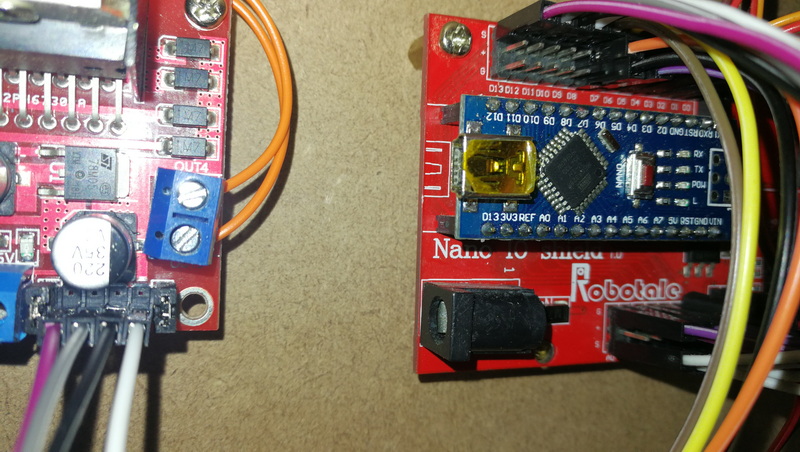
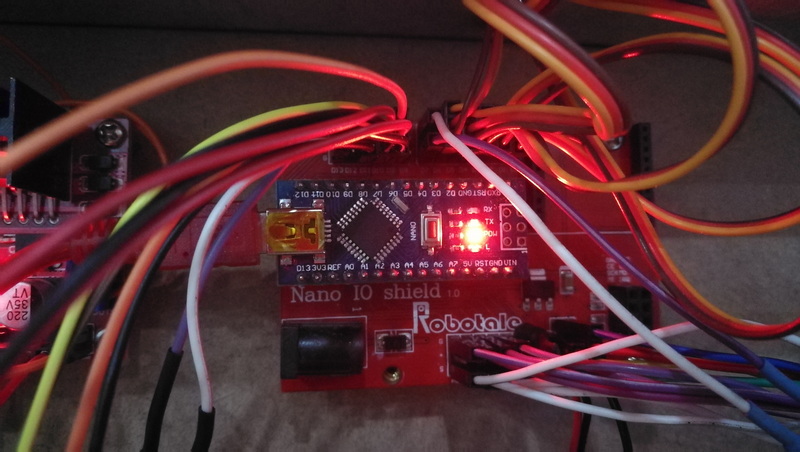
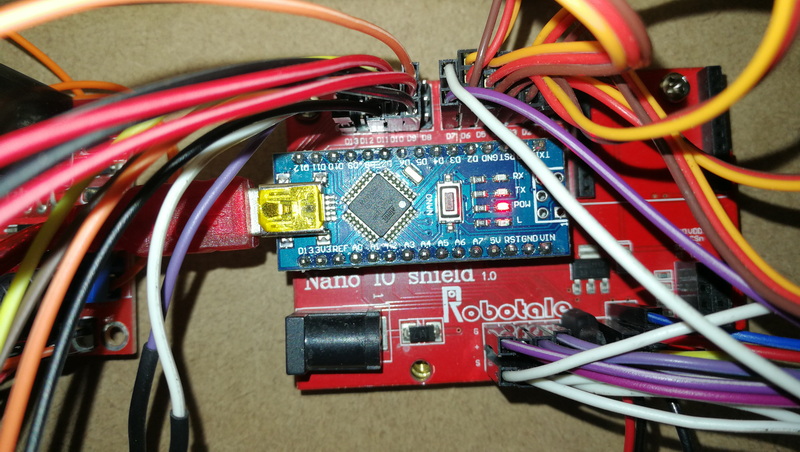
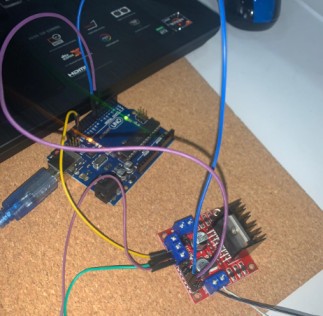
Electronics
Wiring
To controll the motor that we have in the project we used a Arduino And IO Shield.
Pump wiring
LCD wiring
Software
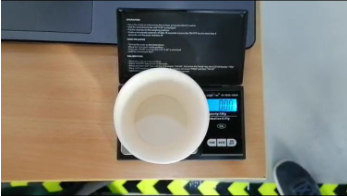
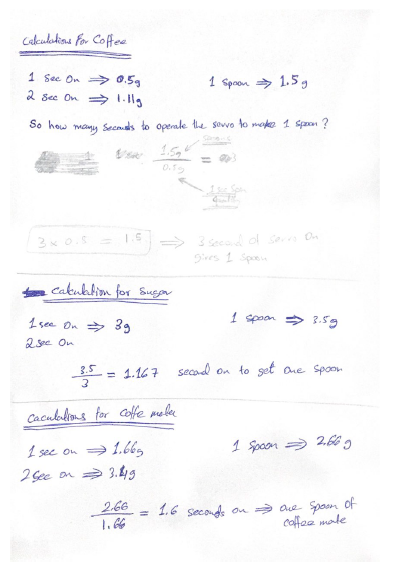
Cacultaion
Here the calculation that we made to adjust the amount of ingredient in one second of motor rotation. For each ingredient we give the motor the signal to start to rotate in order to release the ingredient once the time is over we weight the cup with the ingredient by taking the weight of the cup alone first as reference and then weight with the ingredient which is resulted from the previous process.

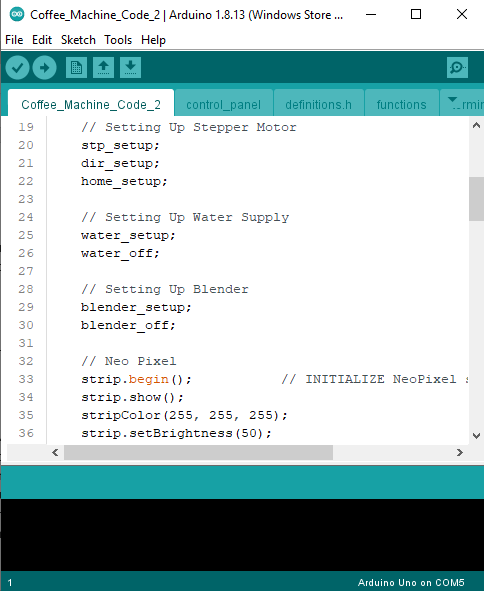
Programming
We use Arduino to program the coffee machine. At first when we start the coffee machine it should start the calibration and tell us that the machine is ready to make the coffee and allow you to select the amount of each ingredient. Once the selection is done the machine start to work automatically without human interact by calculating the time needed for each stage to finish. Once the coffee is ready it allow the user to take the cup out of the machine and return the cup base to the initial position which will be indicated by a limit switch.
Future Developments
For future development we can add a heater to heat the water before it enters the cup in order to make not only an iced coffee but also hot one but in order to that we need to replace the plastic part to any other material that could handle the heat. We can also replace the coffee ingredients with drink mix.